Michael Morabito
November 16, 2026
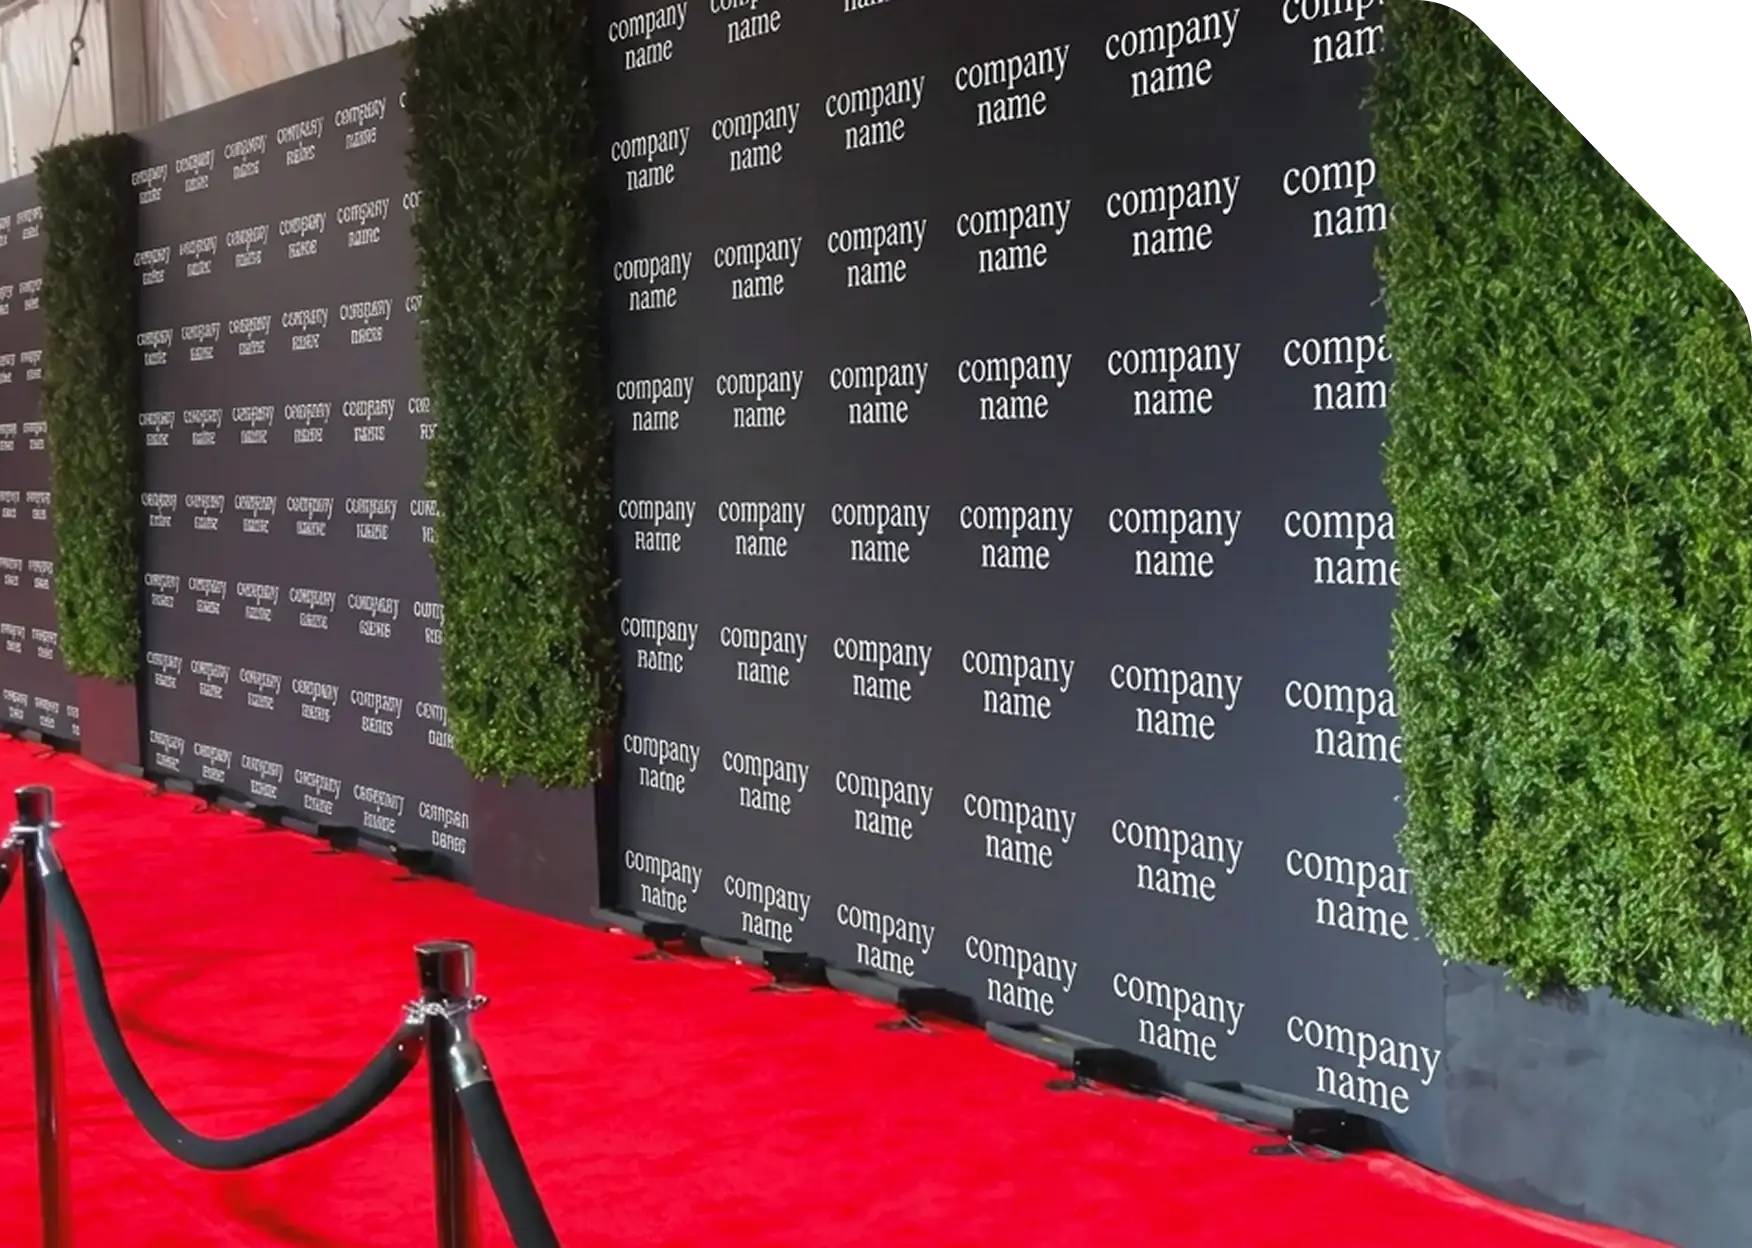
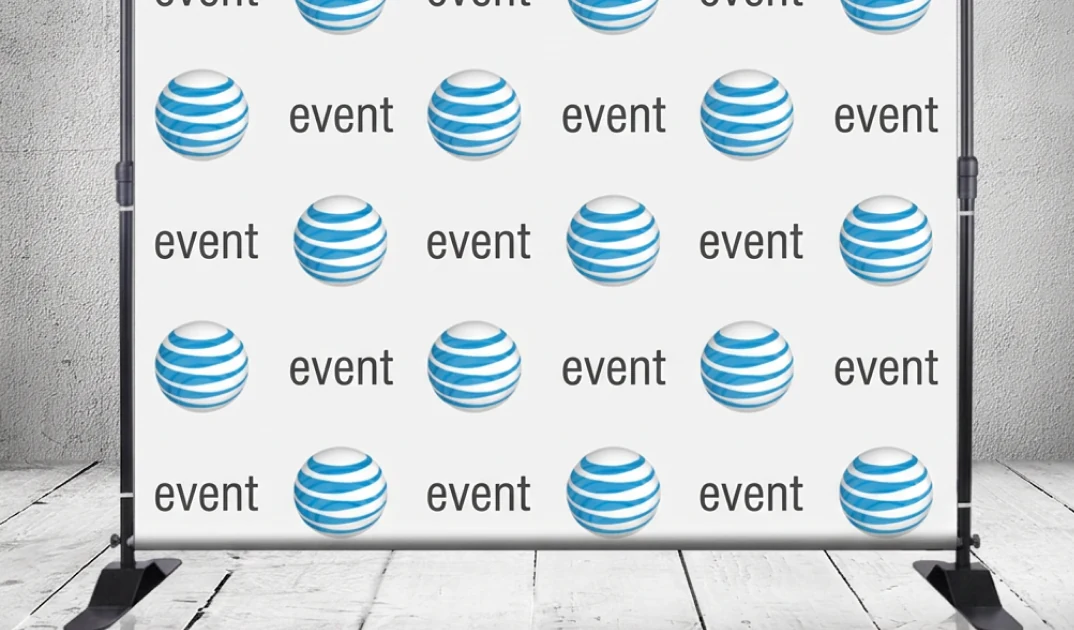
To design a step and repeat backdrop, set up a file at the finished size (for example, 96″ × 96″ for an 8′ × 8′ backdrop) or at an exact 1:10 scale. Place vector logos about 12 to 20 inches wide, with a gap of about half a logo’s width between them, and offset every other row by half a step so the pattern looks like brickwork. Keep full, unbroken logos in the band 4 to 7 feet off the floor, where guests’ heads appear in photos. Leave a margin for grommets or pole pockets, use a plain light background, set colors in CMYK, and export a print-ready PDF with fonts outlined. Unique Print NY at 242 West 36th Street, New York, NY 10018 prints step and repeat backdrops from print-ready files. Call (212) 420-9198 Monday–Friday 9AM–5PM.
A step and repeat looks simple: a logo, repeated. But the details decide whether it works in photos. Logos that are too big get cut off by the people standing in front of them. Logos that are too small turn into a blur on a phone screen. A pattern that isn’t offset leaves empty columns behind some guests, and a file built at the wrong scale or in RGB color prints soft or off-brand at 8 feet wide.
This guide walks through designing a step and repeat from scratch: logo size and spacing, building the repeat pattern, layouts for sponsors, color and background, and setting up a file that prints right the first time. If you haven’t picked a size yet, start with our guide to step and repeat banner sizes. When your file is ready, see our step and repeat banner printing page.
The Parts of a Step and Repeat Design
The Building Block
One logo plus the space around it. The tile is copied across and down the whole backdrop. Its size, logo width plus gap, decides how many logos appear and how big they look in photos.
Half-Step Shift
Every other row shifts sideways by half a tile, like brickwork. The offset fills the gaps that straight columns leave, so a logo appears near every guest whatever their height.
4 to 7 Feet Off the Floor
The band around guests’ heads and shoulders shows in almost every photo. Full, unbroken logos need to fall in this band. The lower third of the backdrop is usually hidden by people.
Edges Get Used
Grommets and pole pockets take up part of the edge. Anything placed there may be punched through or folded into a sleeve. Logos should start inside the margin, never on it.
Logo Size and Spacing
Most step and repeats use logos between 12 and 20 inches wide, with a gap of about half a logo’s width between them. Here is roughly how many logos each combination gives you on the two standard sizes:
| Logo Width | Gap | Repeats Every | Logos per Row (8 ft wide) | Approx. Logos on 8′ × 8′ | Approx. Logos on 8′ × 10′ |
|---|---|---|---|---|---|
| 12″ | 6″ | 18″ | About 5 | About 28 | About 36 |
| 16″ ★ | 8″ | 24″ | 4 | About 16 | About 20 |
| 20″ | 10″ | 30″ | About 3 | About 10 | About 13 |
Counts include partial logos cut off at the edges, which is normal for a repeating pattern. As a starting point:
-
16 inches suits most single-logo backdrops.
It reads clearly in full-length photos and still leaves a complete logo beside each person in a close crop. -
12 inches suits two-logo layouts and wide wordmarks.
Smaller tiles keep a host and a sponsor logo near every guest, and stop long wordmarks from being cut off by people’s heads. -
20 inches suits bold, simple marks seen from a distance.
Use it for icon-only logos on red carpets and press walls, where photographers shoot from farther back.
Before you send the file, print a page of the pattern at 1:10 scale, stand a coin or a small figure in front of it, and take a photo from a few feet away. If you can’t recognize the logo in the photo, or a full logo doesn’t appear beside the “person,” change the logo size or the gap.
How to Build the Pattern, Step by Step
These steps work in Adobe Illustrator, InDesign, Affinity Designer, or any layout tool that handles vector files and exports PDF.
-
Set up the document at the finished size or at 1:10 scale
For an 8′ × 8′ backdrop, that’s 96″ × 96″ at full size, or 9.6″ × 9.6″ at 1:10. For 8′ × 10′, it’s 96″ tall by 120″ wide, or 9.6″ × 12″ at 1:10. If your software limits the page size, use the scale version and tell us the scale when you order. Ask for the finishing margin before you start. -
Place the logo as vector artwork
Use the original AI, EPS, SVG, or vector PDF file from whoever designed the logo. A PNG or JPG copied from a website or email signature will look blurry and jagged at 8 feet. Use the simplest version of the logo, often the icon or wordmark alone, without small taglines. -
Build one repeat tile
Draw an invisible box the width of the logo plus the gap, for example 24″ × 24″ for a 16″ logo with an 8″ gap, and center the logo in it. This box is your tile. Using a fixed box keeps the spacing exact when you copy it. -
Repeat the tile across and down, offsetting every other row
Copy the tile edge to edge to fill one row, then copy that row down. Shift every second row sideways by half a tile, for example 12″ for a 24″ tile. Let logos run off the edges; partial logos at the borders are normal and keep the pattern even. -
Check the photo zone and the margins
Draw a guide band from 4 to 7 feet up (48″ to 84″ from the bottom at full size). Make sure complete logos fall inside it across the width of the backdrop. Then check that no logo is placed in the finishing margin at the edges where grommets or pole pockets go. Nudge the whole pattern up or down if needed. -
Set color, outline fonts, and export a print-ready PDF
Set the document to CMYK and note any Pantone colors you need matched. Convert any text to outlines. Raster images such as photo backgrounds should be about 100–150 DPI at full size. Export a high-quality print PDF, and include the finished size and scale in the file name.
Layouts for Sponsors and Co-Branded Events
| Layout | How It Works | Best For |
|---|---|---|
| Single logo | One logo repeated in an offset pattern | Brand events, launches, company parties |
| Two-logo checkerboard | Host and sponsor logos alternate in every row and column, sized to the same visual weight | Co-hosted events, single-sponsor partnerships |
| Alternating rows | Each row holds one logo; rows alternate between host and sponsors | Three or four sponsors of equal standing |
| Hero panel | A larger host or title-sponsor logo sits centered at head height, with the repeat pattern around it | Galas, premieres, and events with a title sponsor |
With more than four logos, the pattern gets busy and every logo ends up small. Consider a wider backdrop, or move the long sponsor list to a separate sponsor board and keep the step and repeat to the host and one or two key partners.
Color and Background
Background & Contrast
A white or light background is the safe choice. It lights evenly under flash, keeps skin tones natural, and makes most logos stand out. Light brand colors work too.
Dark backgrounds need reversed logos and more light. A black or navy backdrop can look dramatic, but use the white or reversed version of each logo, and expect photos to need more light than a light backdrop.
Keep contrast high between logo and background. A mid-gray logo on a light gray background disappears in photos. If a sponsor’s logo is a similar color to your background, place it on a small contrasting shape or use its one-color version.
Set CMYK and name the brand colors. Screens show colors in RGB; printers use CMYK. Convert the file to CMYK and list any Pantone references, so we can match brand colors as closely as possible. A matte finish keeps flash glare off the logos.
Dark background: use reversed logos
CMYK + Pantone references
Common File Mistakes (and How to Avoid Them)
| Mistake | What Happens | Fix |
|---|---|---|
| Low-resolution logo | Blurry, jagged edges at 8 feet | Use the original vector file (AI, EPS, SVG, or vector PDF) |
| RGB color | Brand colors shift when printed | Convert to CMYK and list Pantone references |
| Fonts not outlined | Text swaps to a default font | Convert text to outlines before exporting |
| Logos in the finishing margin | Logos punched by grommets or hidden in a pole pocket | Ask for the margin first and keep logos inside it |
| Scale not stated | A 1:10 file gets mistaken for full size | Put the finished size and scale in the file name and the order |
| No logos in the photo zone | Gaps behind guests’ heads in photos | Check the 4–7 ft band and shift the pattern |
Our print guidelines and PDF checklist for commercial printing cover file preparation in more detail. For material choices, see our guide to banner printing materials.
Frequently Asked Questions
Your Step and Repeat, Printed in Midtown Manhattan
Send your print-ready PDF and we’ll print it in matte vinyl or fabric, in standard 8′ × 8′ and 8′ × 10′ or custom sizes, finished with grommets or pole pockets. Printing in New York since 1977.
242 West 36th Street, New York, NY 10018 · (212) 420-9198 · Mon–Fri 9AM–5PM · Minimum order $175
Michael Morabito
November 16, 2026